PicklePlayces Help
How To Use the App
PicklePlayces allows you to see how many players are at a pickleball court at any time. So if there are too many players, you may want to come down later or go to a different court. Conversely, you may come down to play and see there aren't enough players. In that case, you can send out a notification that more players are needed. Everyone that has added that court to their list and enabled notifications will get a message for the request.
Adding Courts to Your List
When PicklePlayces starts it looks to see if you've added any courts to your list. If you haven't, it will show you a list of all the courts within a 25 mile radius. You can add any of those courts by clicking the Pickleball icon next to the court name. After you've added a court, or if you don't see any courts in the list, you can use the ADD A COURT button to add a court to your list.
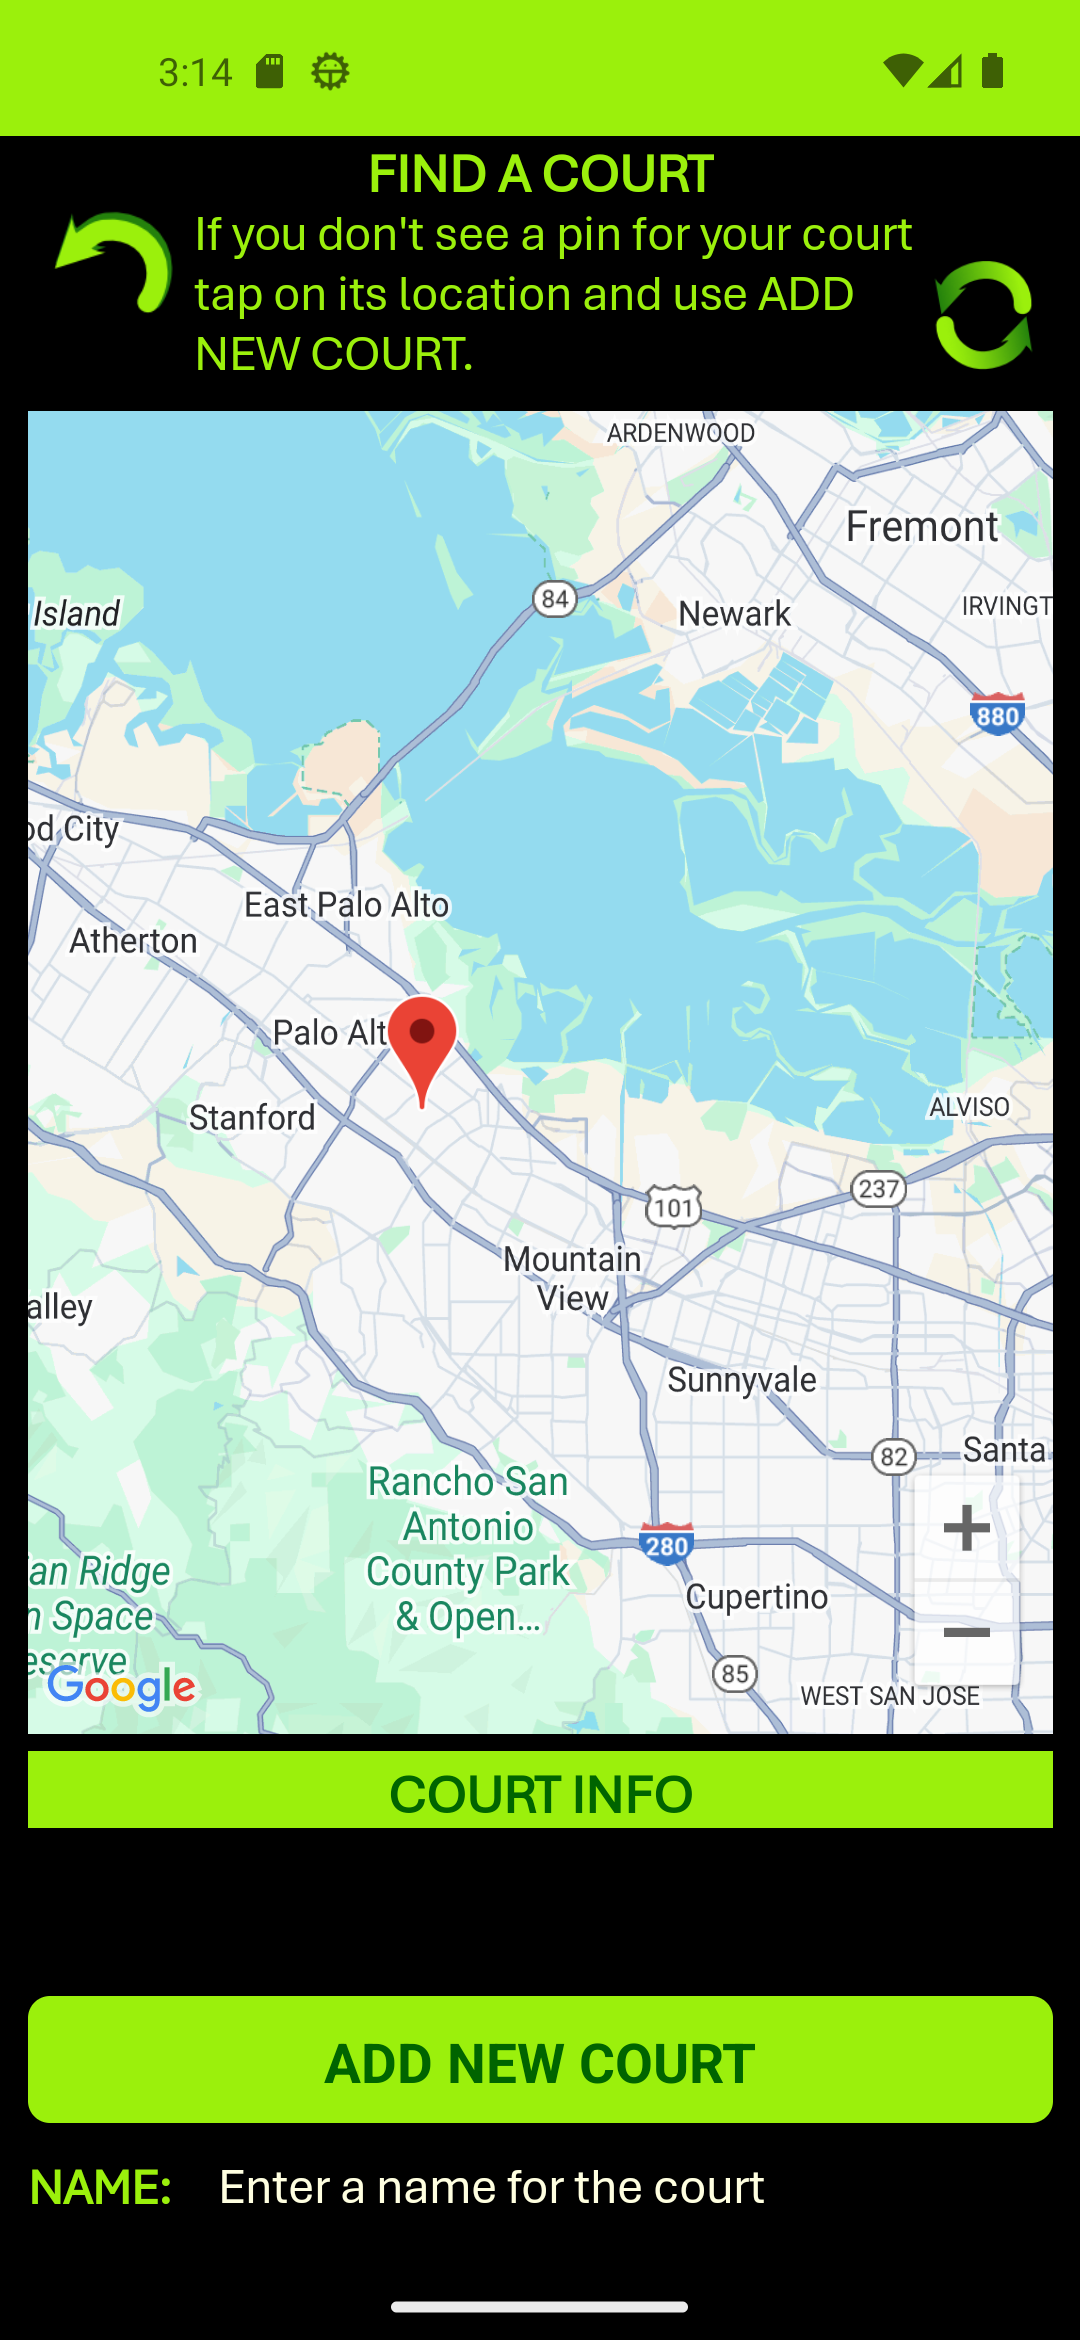
When you click the ADD A COURT button, you will see a list of all the courts that have been added in your area. If you don't see a court nearby you can move the map around to look for courts. If you play far away from the location it's showing you, then move the map to an area near you and click the Refresh button. If the court you play at is not shown on the map, you can request to have it added. Simply click on the map where the court is at, and you will be able to type in a name for the court. Click the ADD NEW COURT button and a request will be sent to us to add the court. We will verify the court location and then add it to the map. This process may take up to a week.
Managing Your List of Courts
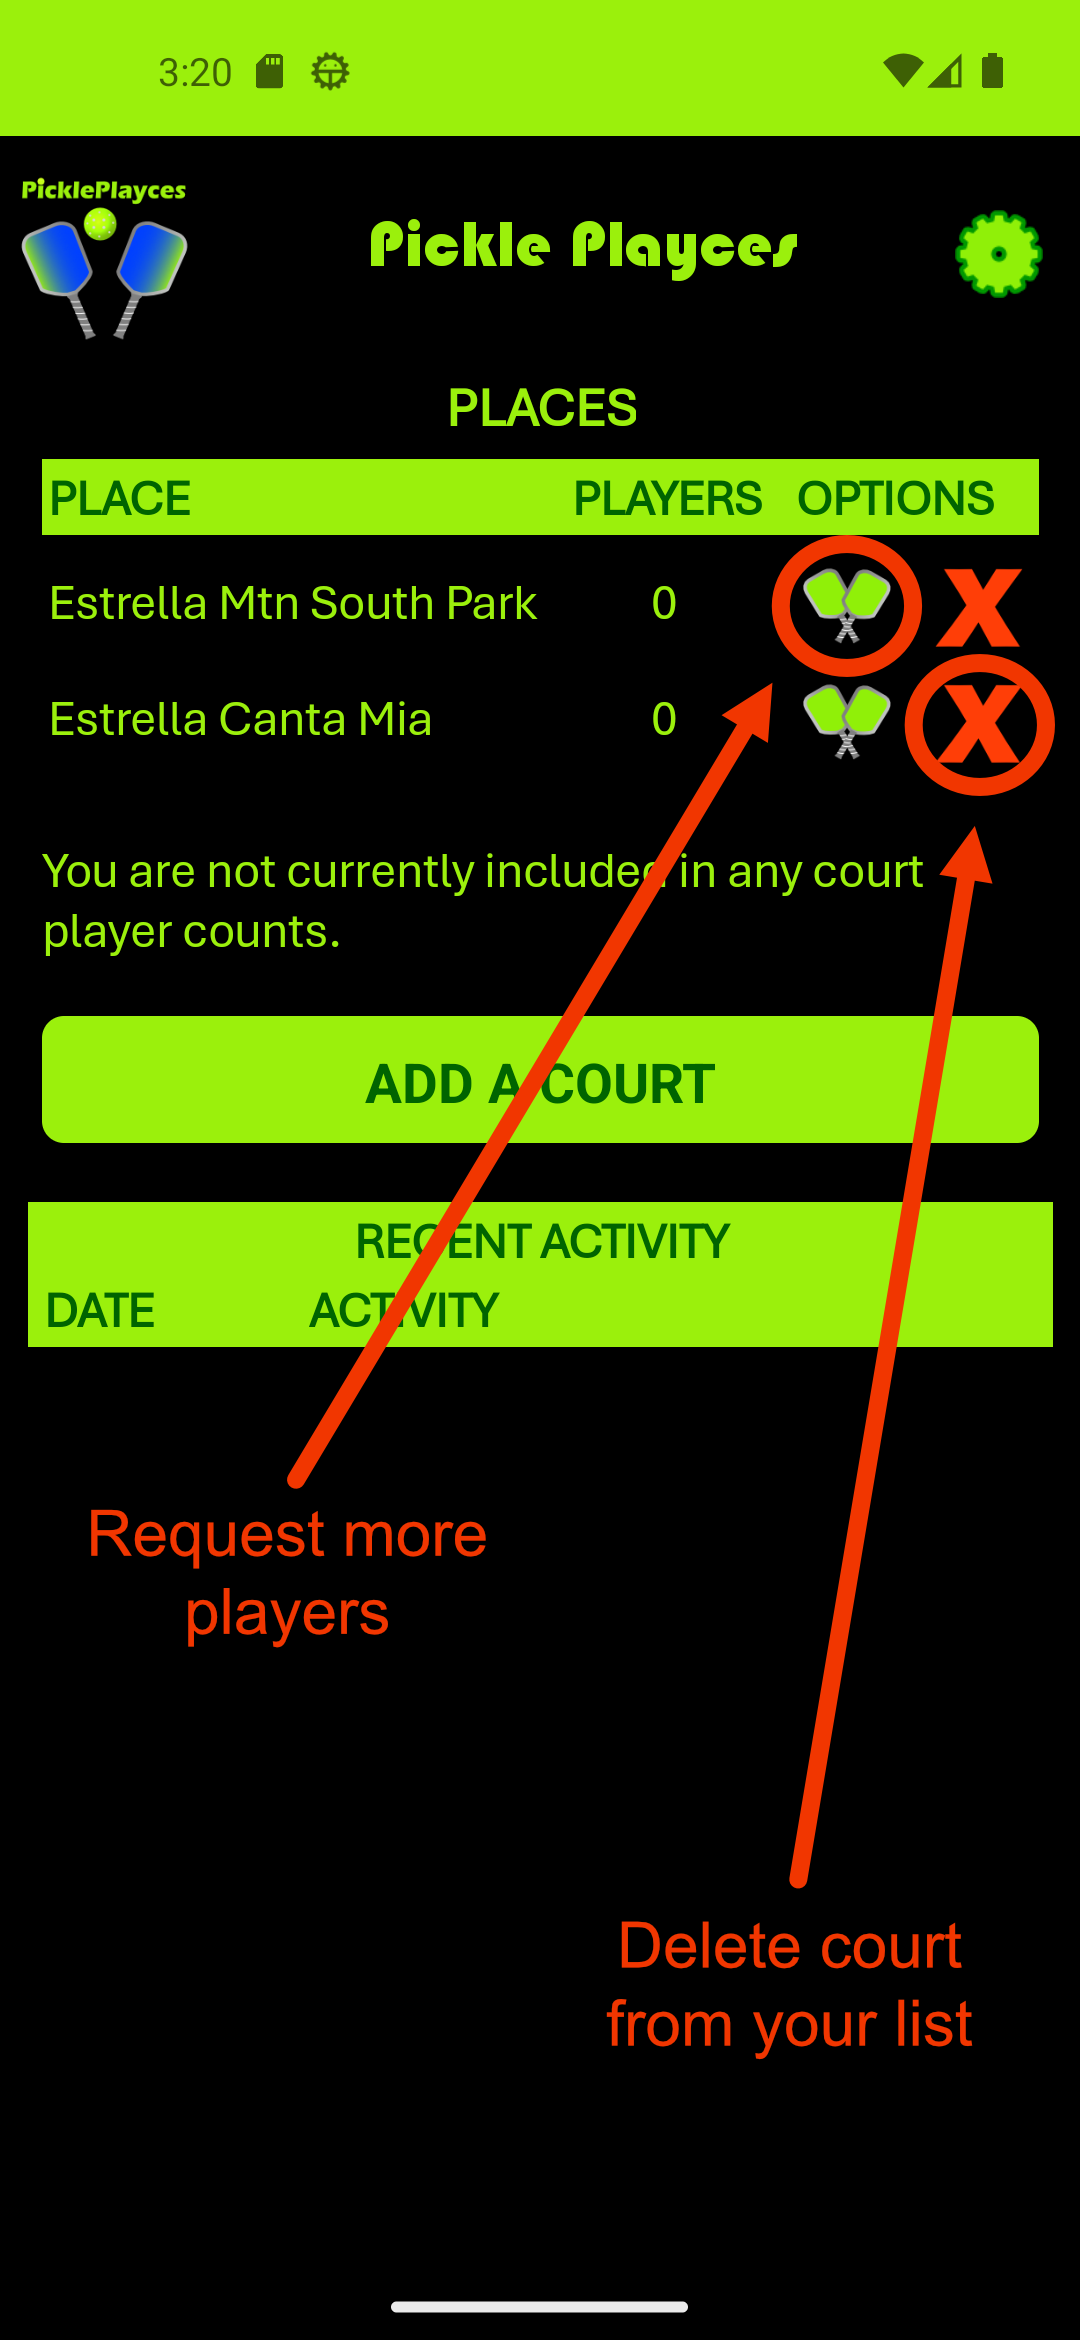
On the home page of the PicklePlayces app you'll see all the courts you've added to your list, along with the number of players at each court. If you see more players are needed at a court you're playing at, you can tap the notification button. Everyone that has that court in their list and who has configured the app to receive notifications will get a text message letting them know where people are needed. Note that you can't send a notification unless you are actually checked in at a court. If you are no longer interested in a court, you can just click the delete button to remove it from your list.
Check In and Out in the Background
The way PicklePlayces knows how many players are at a court is that it automatically checks you in and out of any court you've added to your list. This can happen automatically whether you have the app open or not, as long as you have selected the option in Settings to check you in and out of courts even when the app isn't running.
IMPORTANT! Depending on whether you are using the app in the foreground or background, it can take 5 to 15 minutes for your status to be updated on your phone.
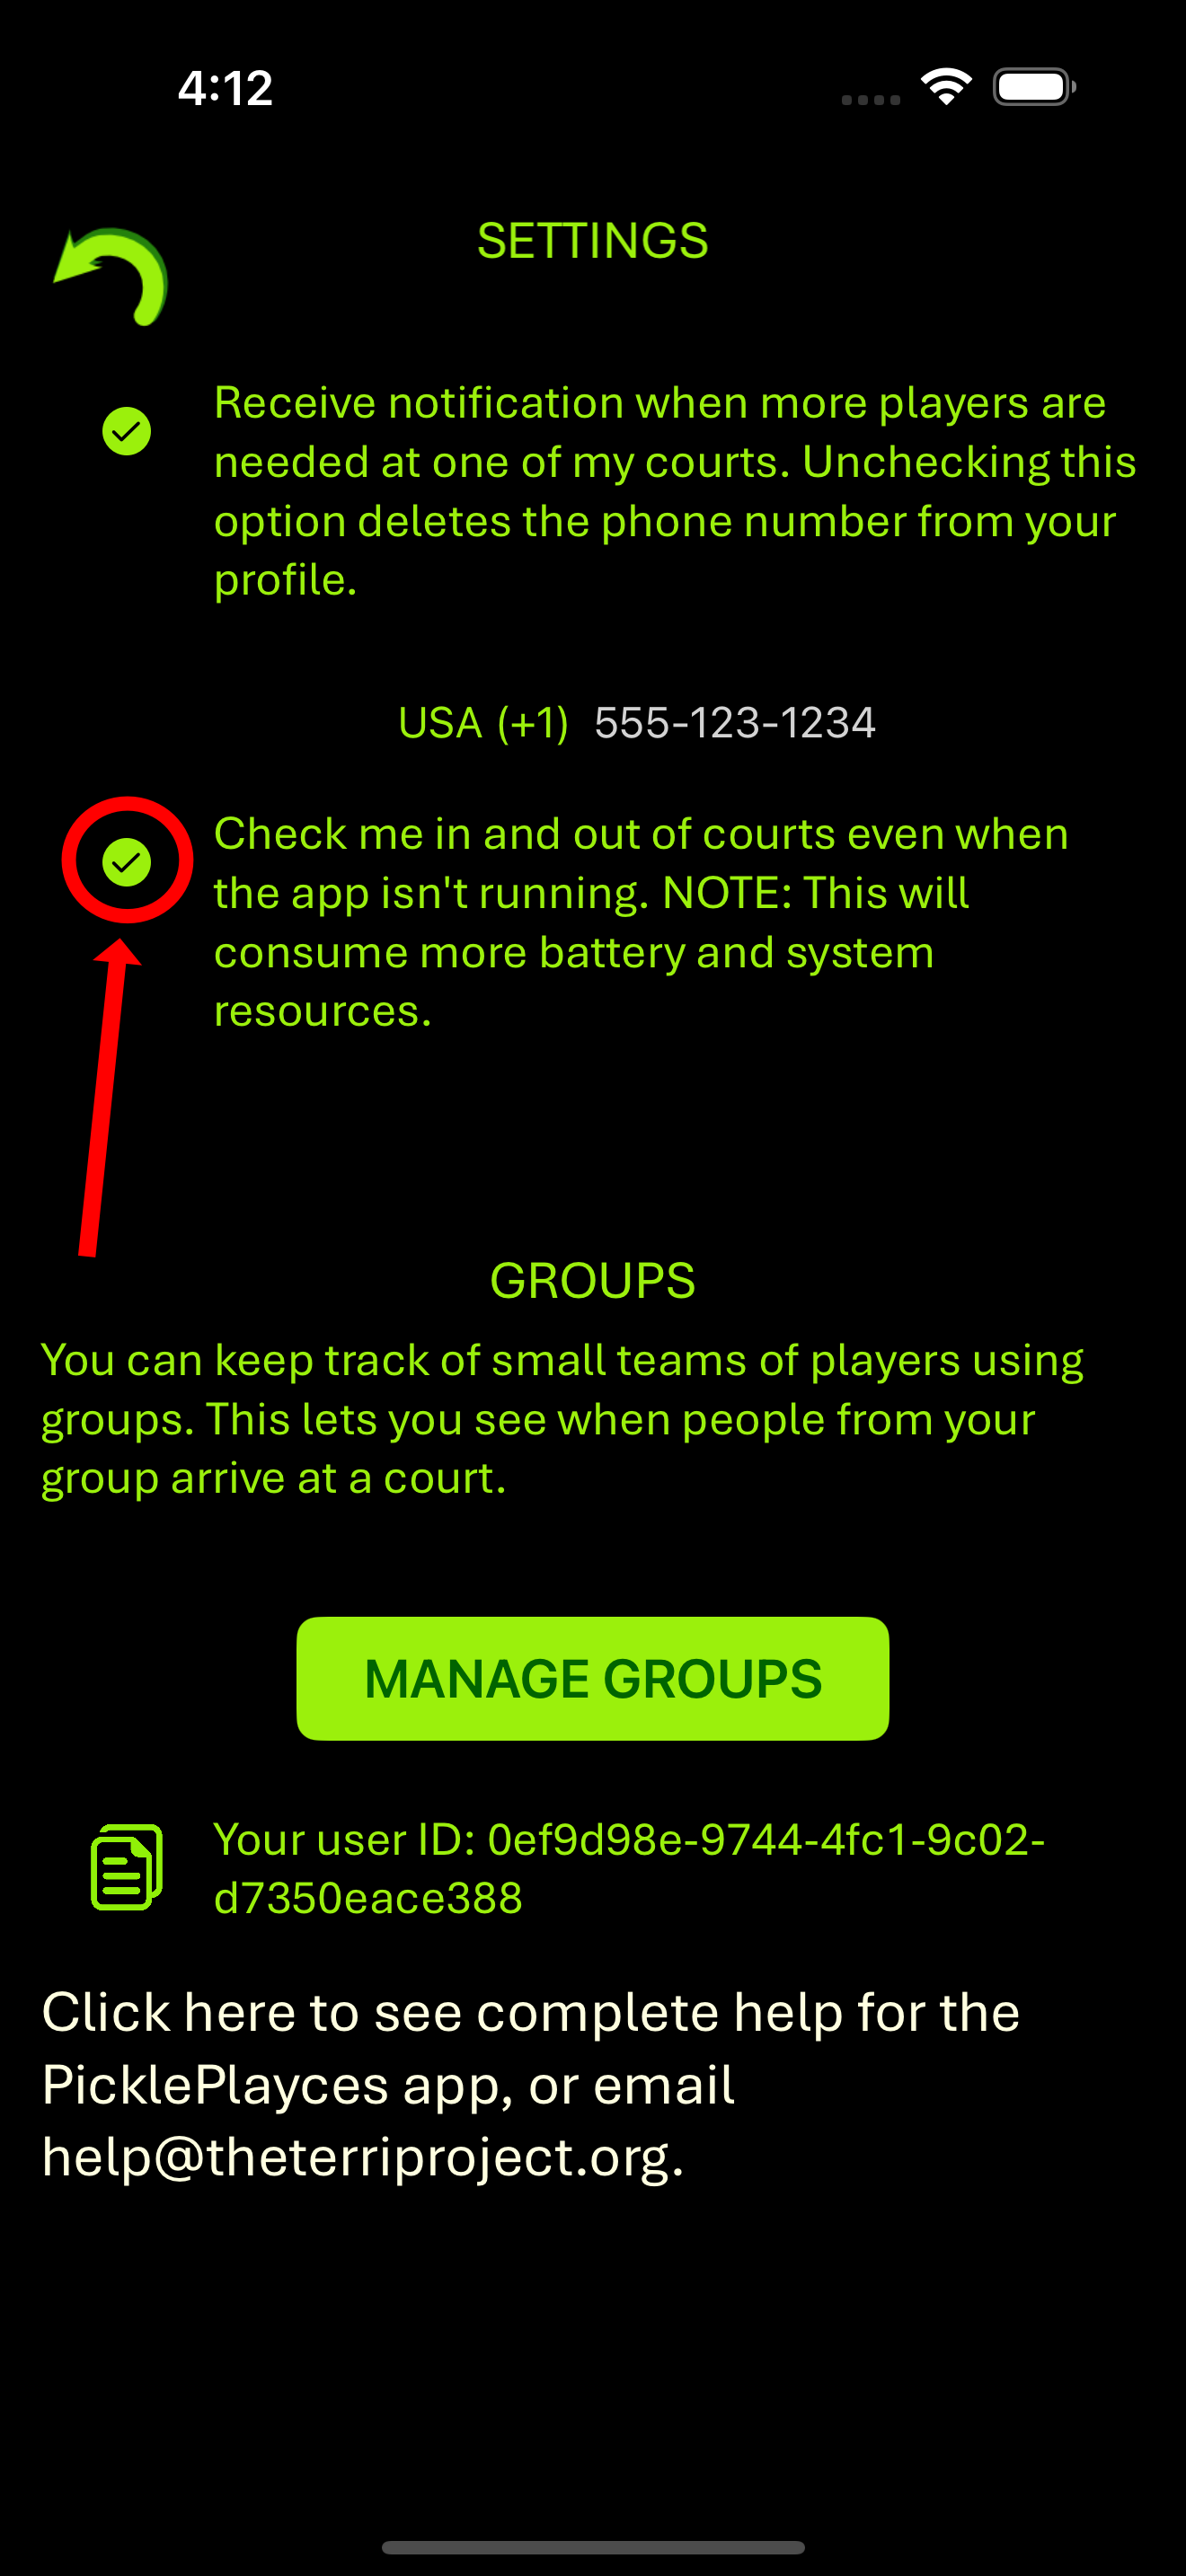
NOTE: This is disabled by default, so you need to go into the settings to enable it. To do that, use this option to allow check in and out to happen even when the app isn't running:
Managing Groups
The Groups feature in PicklePlayces allows you to create unlimited groups and invite your friends to join. Once your groups are set up, you'll see in your feed when anyone from any of your groups checks in to play at one of your usual courts. Whether you have a regular practice group or want to catch up with friends for a game, PicklePlayces Groups makes it easy to connect and join the fun.
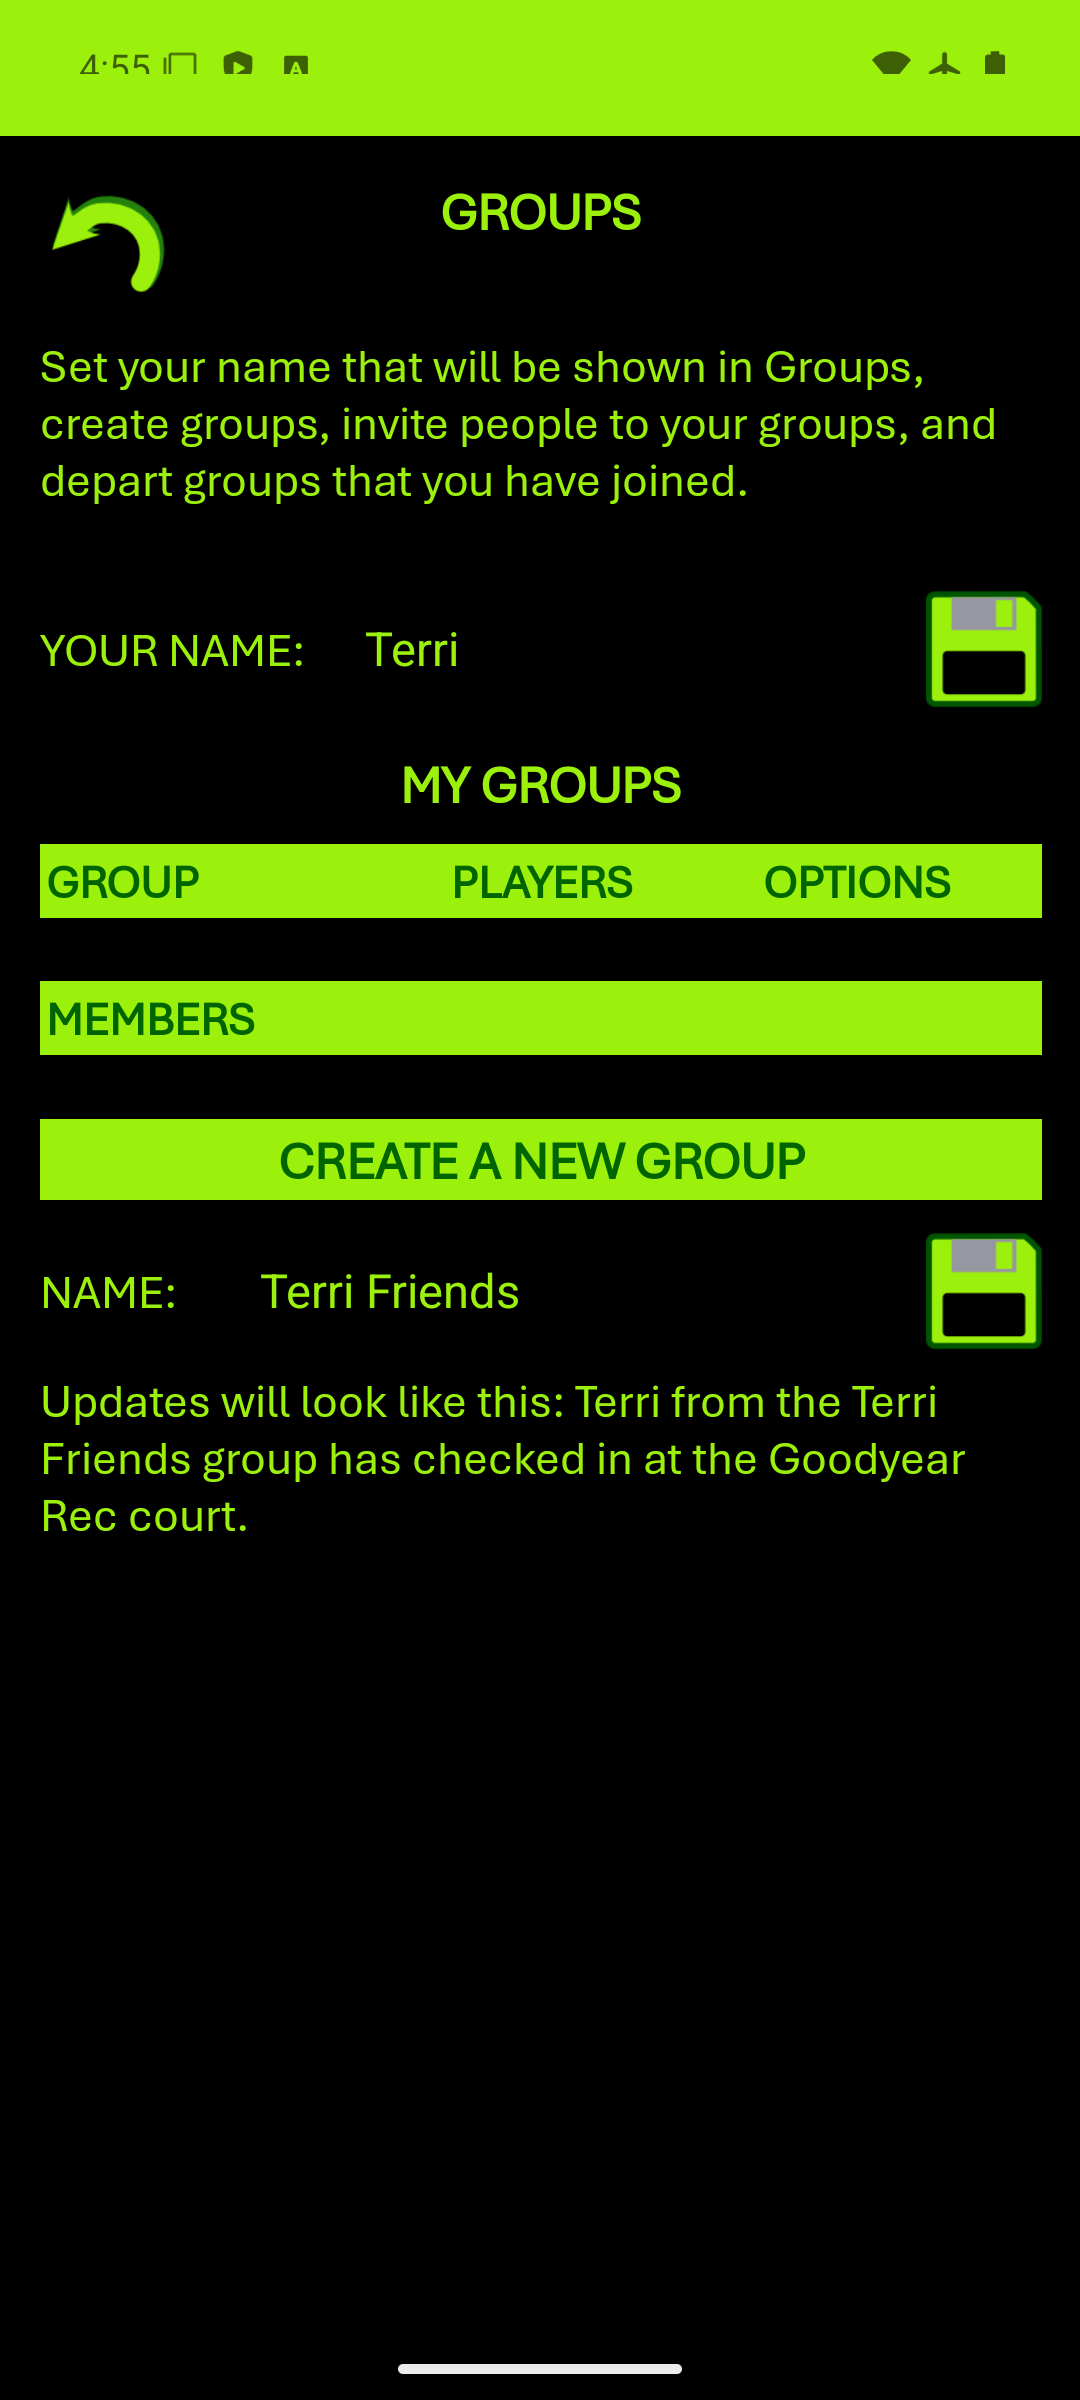
Before you can do anything with Groups, you have to fill out the YOUR NAME field. You can use whatever you want, but that's the name that will show up in the feed of people in any of your groups when you check into a court. The image below shows what it looks like when you open the Groups page the first time. Just type in the name you want to use; that will cause the Save icon to appear, and you can click that to save your changes. If you want to change your name at any time, you can just type in a new name and click the Save button. Whatever name you use will automatically be updated in the feeds of all the people in all of the groups to which you belong.
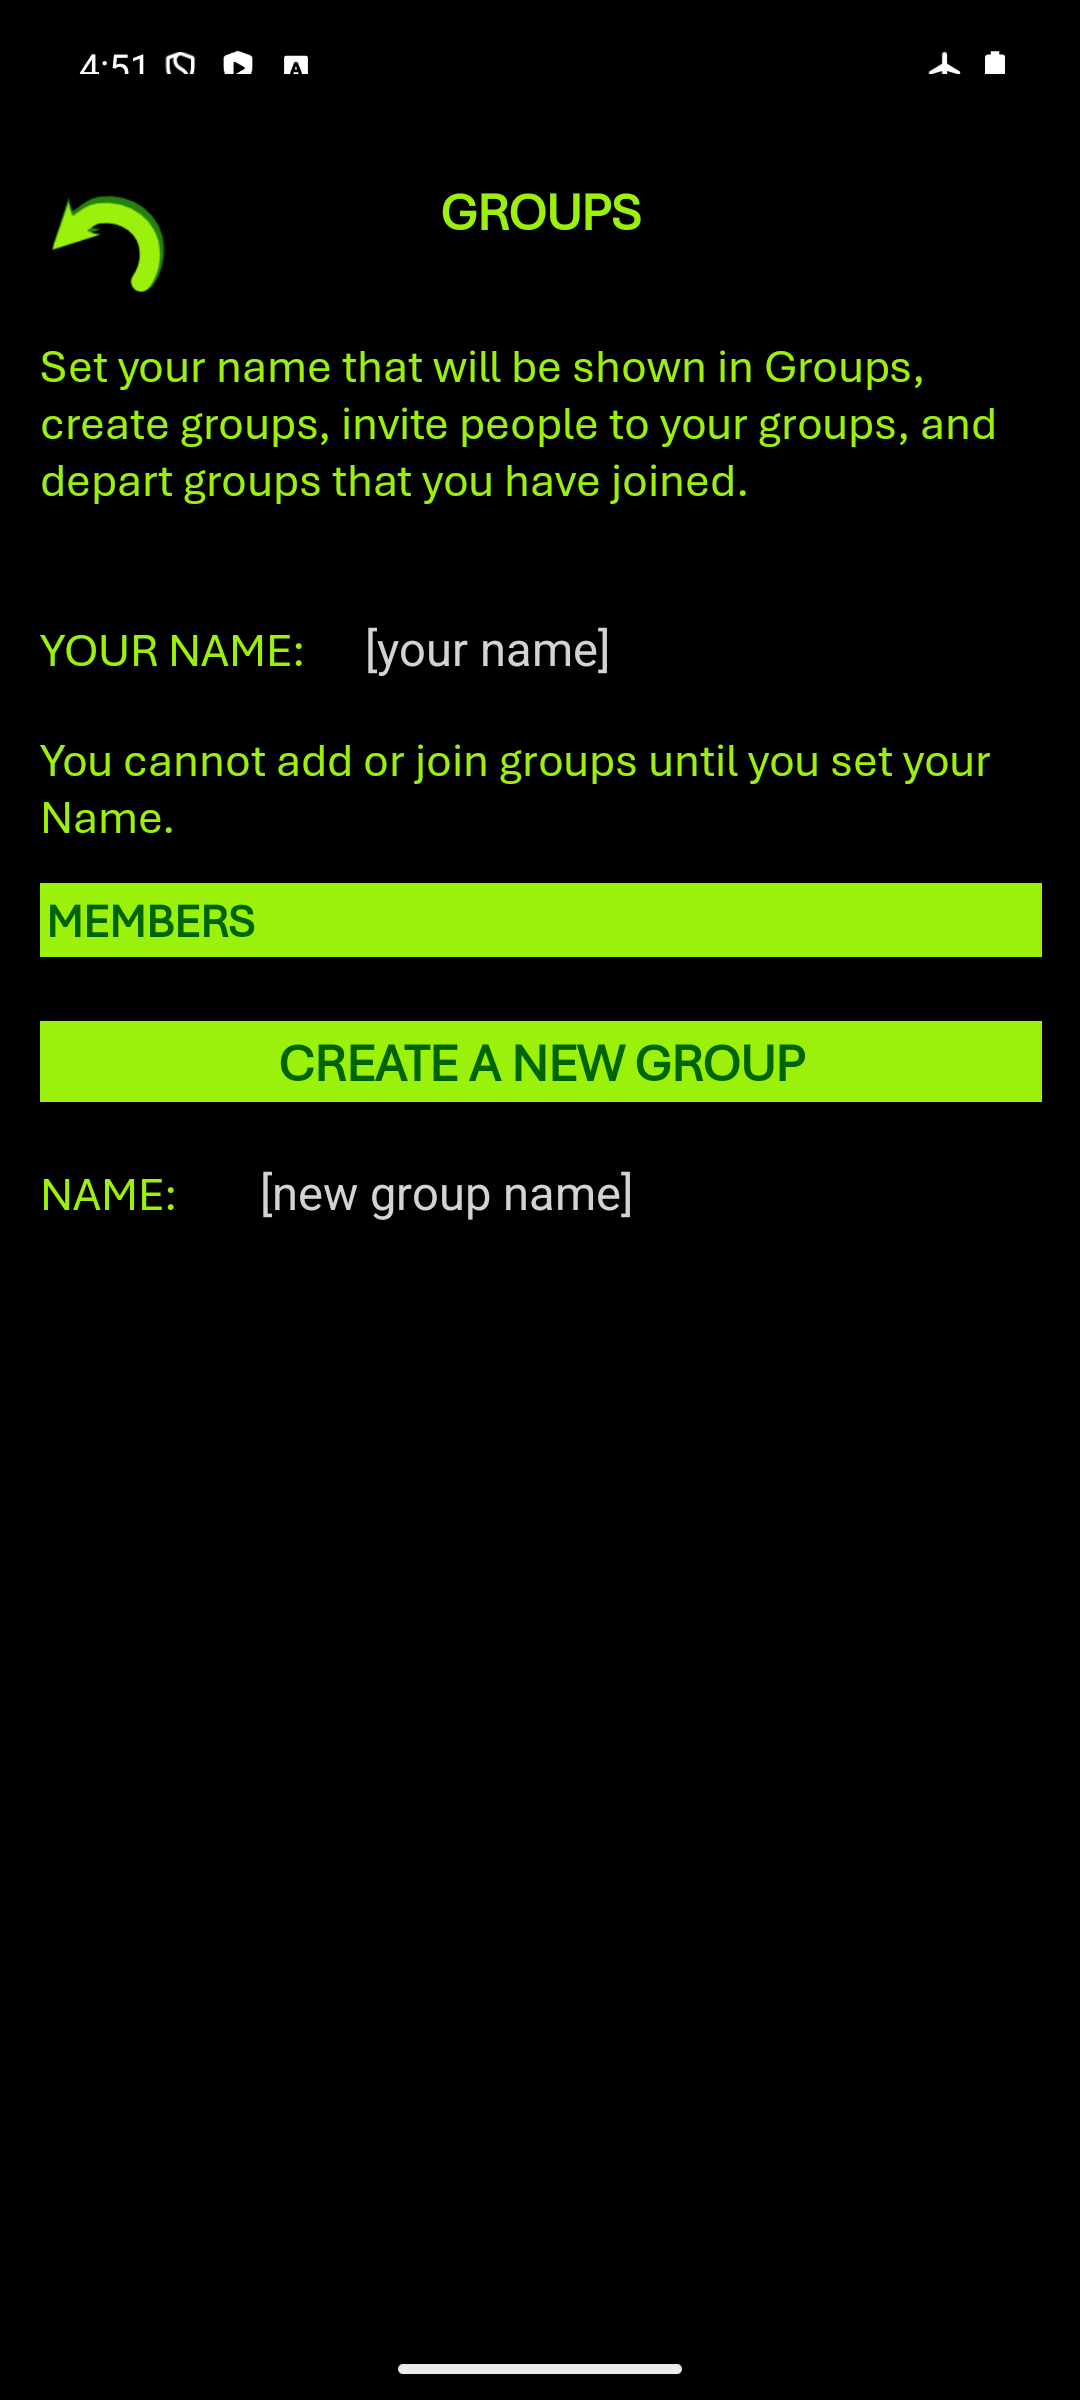
After you've saved your name, you can begin creating Groups. You will see an edit field near the bottom of the screen where you can type in whatever Group name you want. The app shows you how the Group name will show up in the feed of people that belong to that Group. Once you've typed in the Group name, click the Save icon. You will then be able to manage the Group. The picture below only shows one Group, but note that you can create as many Groups as you want.
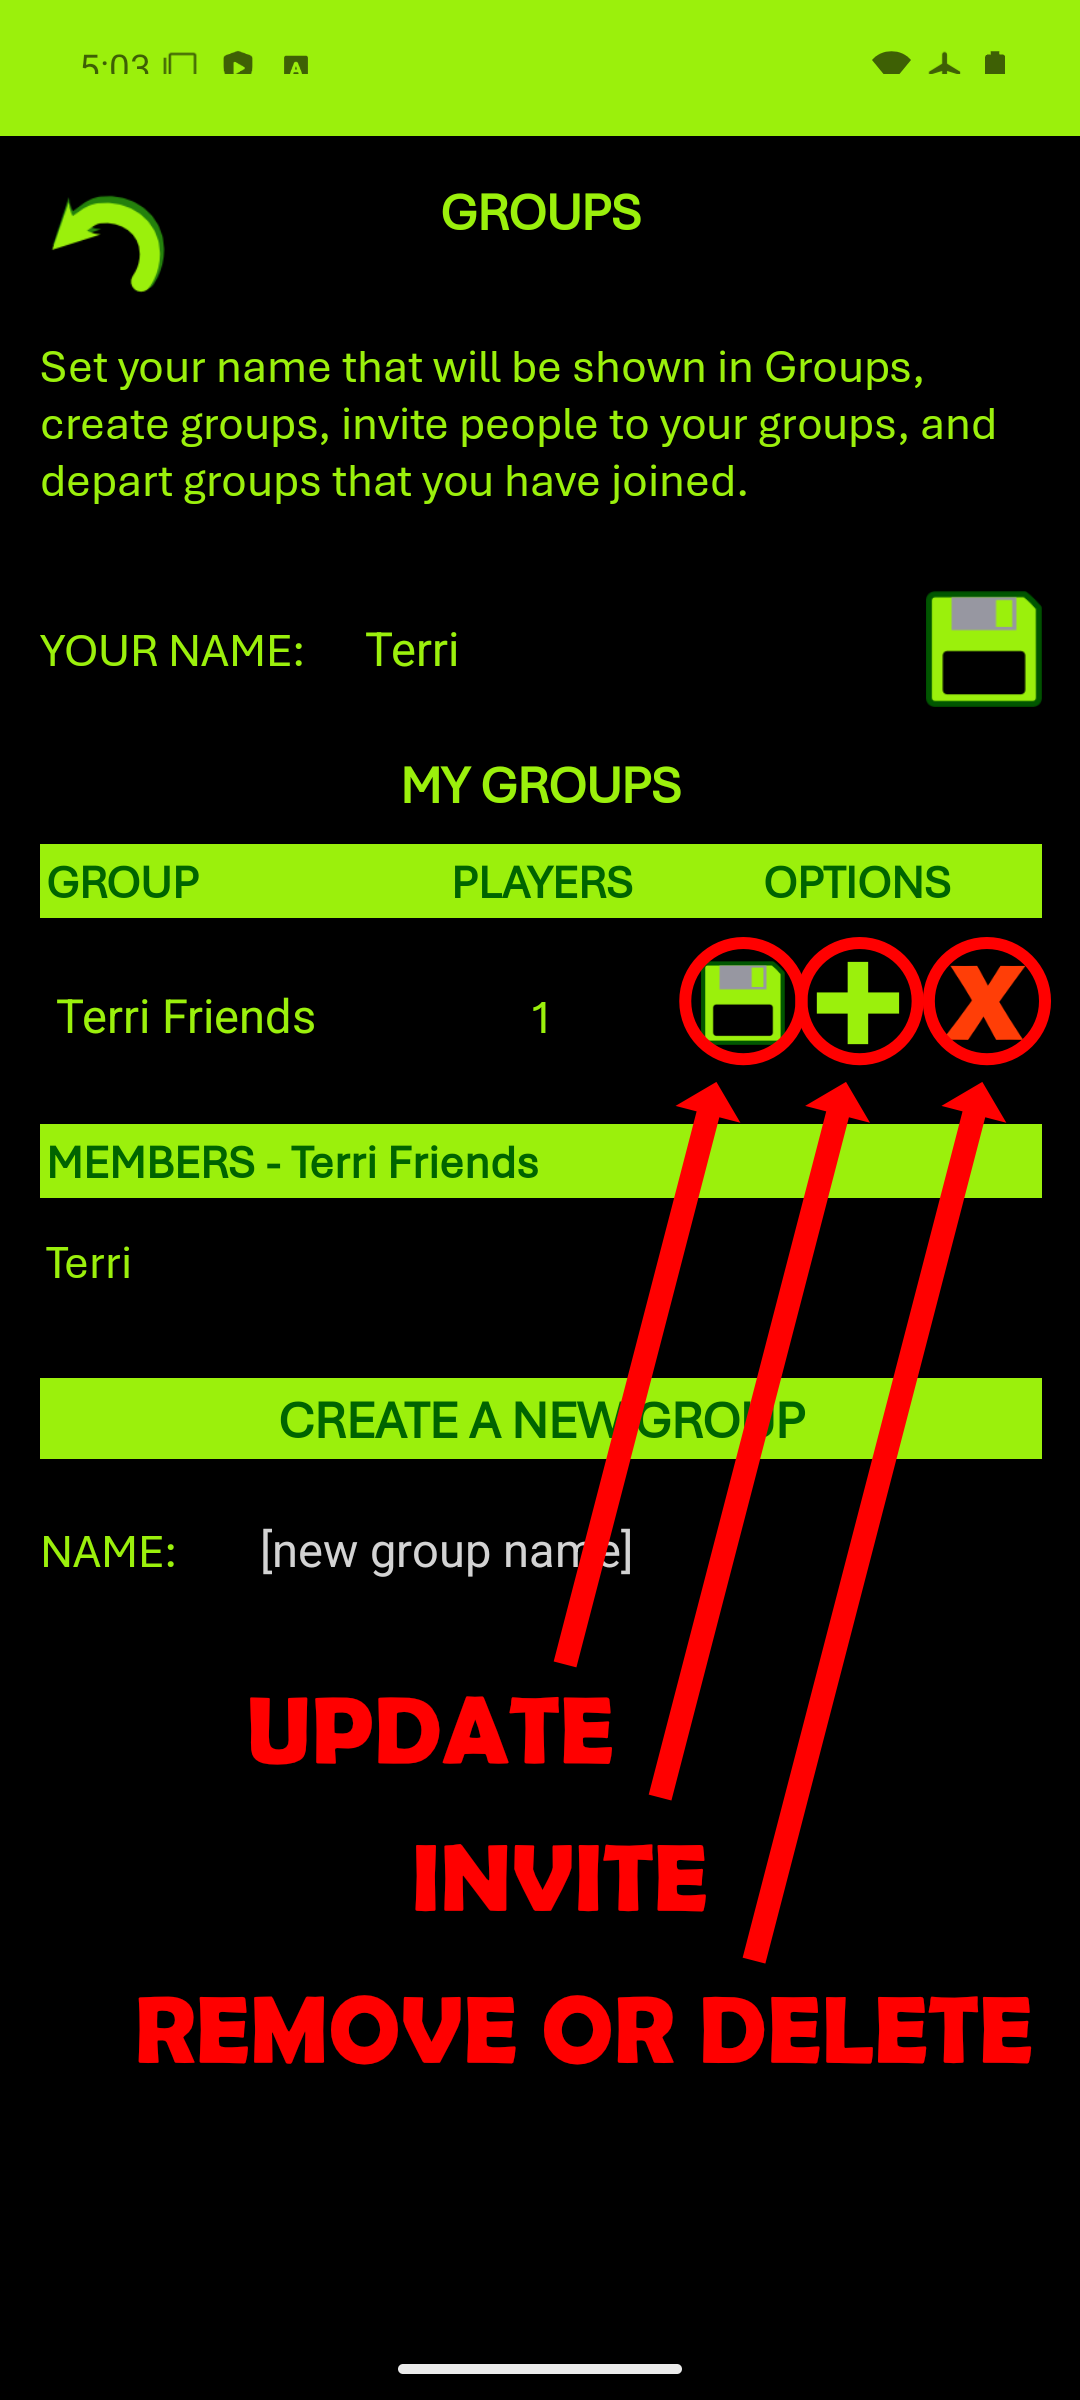
The list of Groups you see includes both Groups that you created, as well as Groups that other people created and you have joined. For Groups that you have created, you can change the Group name by just typing in a new name; for Groups that you did not create, you will not be able to type in the Group name. The Save icon does not appear until you actually change it. Once your changes are complete, click the Save icon to Update your changes.
Groups that you created will also have a plus sign next to the Group name. To invite someone to your Group, just click the plus sign. A dialog appears in which you need to enter the phone number for the person to which you want to send an invitation (NOTE: Only phone numbers in the US and Canada are currently supported). After you type in the phone number and click the Send Invite button, the phone opens up a new text message addressed to that phone number. You can then change the message that is going to be sent, or just delete it if you decide you don't want to send the invite. Otherwise, just send it like you do any other text message, and it will be delivered to the recipient's phone.
IMPORTANT! Do NOT change the link that is included in the text message. If you do, the invitation will fail.
All Groups have a large red X after the Group name. If it is next to a Group that you joined but did not create, it simply removes you from that Group. No notification is sent to the Group owner, so you can leave whenever you want, but you won't be able to rejoin unless you are sent a new invitation. If you own the Group and click the red X, it deletes the whole group, and removes all of the members of it. If you do that, then all of the activity for that Group will no longer appear in anyone's feed.
Opting In or Out of Notifications
PicklePlayces allows notifications to be sent when more players are needed at a court. You can choose to opt in to receive these messages for courts that you have added to your list. You can also choose to opt out if you no longer wish to receive these notifications. The process for doing so is extremely simple, and is done entirely in the PicklePlayces mobile app.
How to Opt In
You will not receive notifications by default when you install the PicklePlayces app; you must choose to opt in. Use the following steps to do so:
Opt In
- Click the Settings icon on the start page.
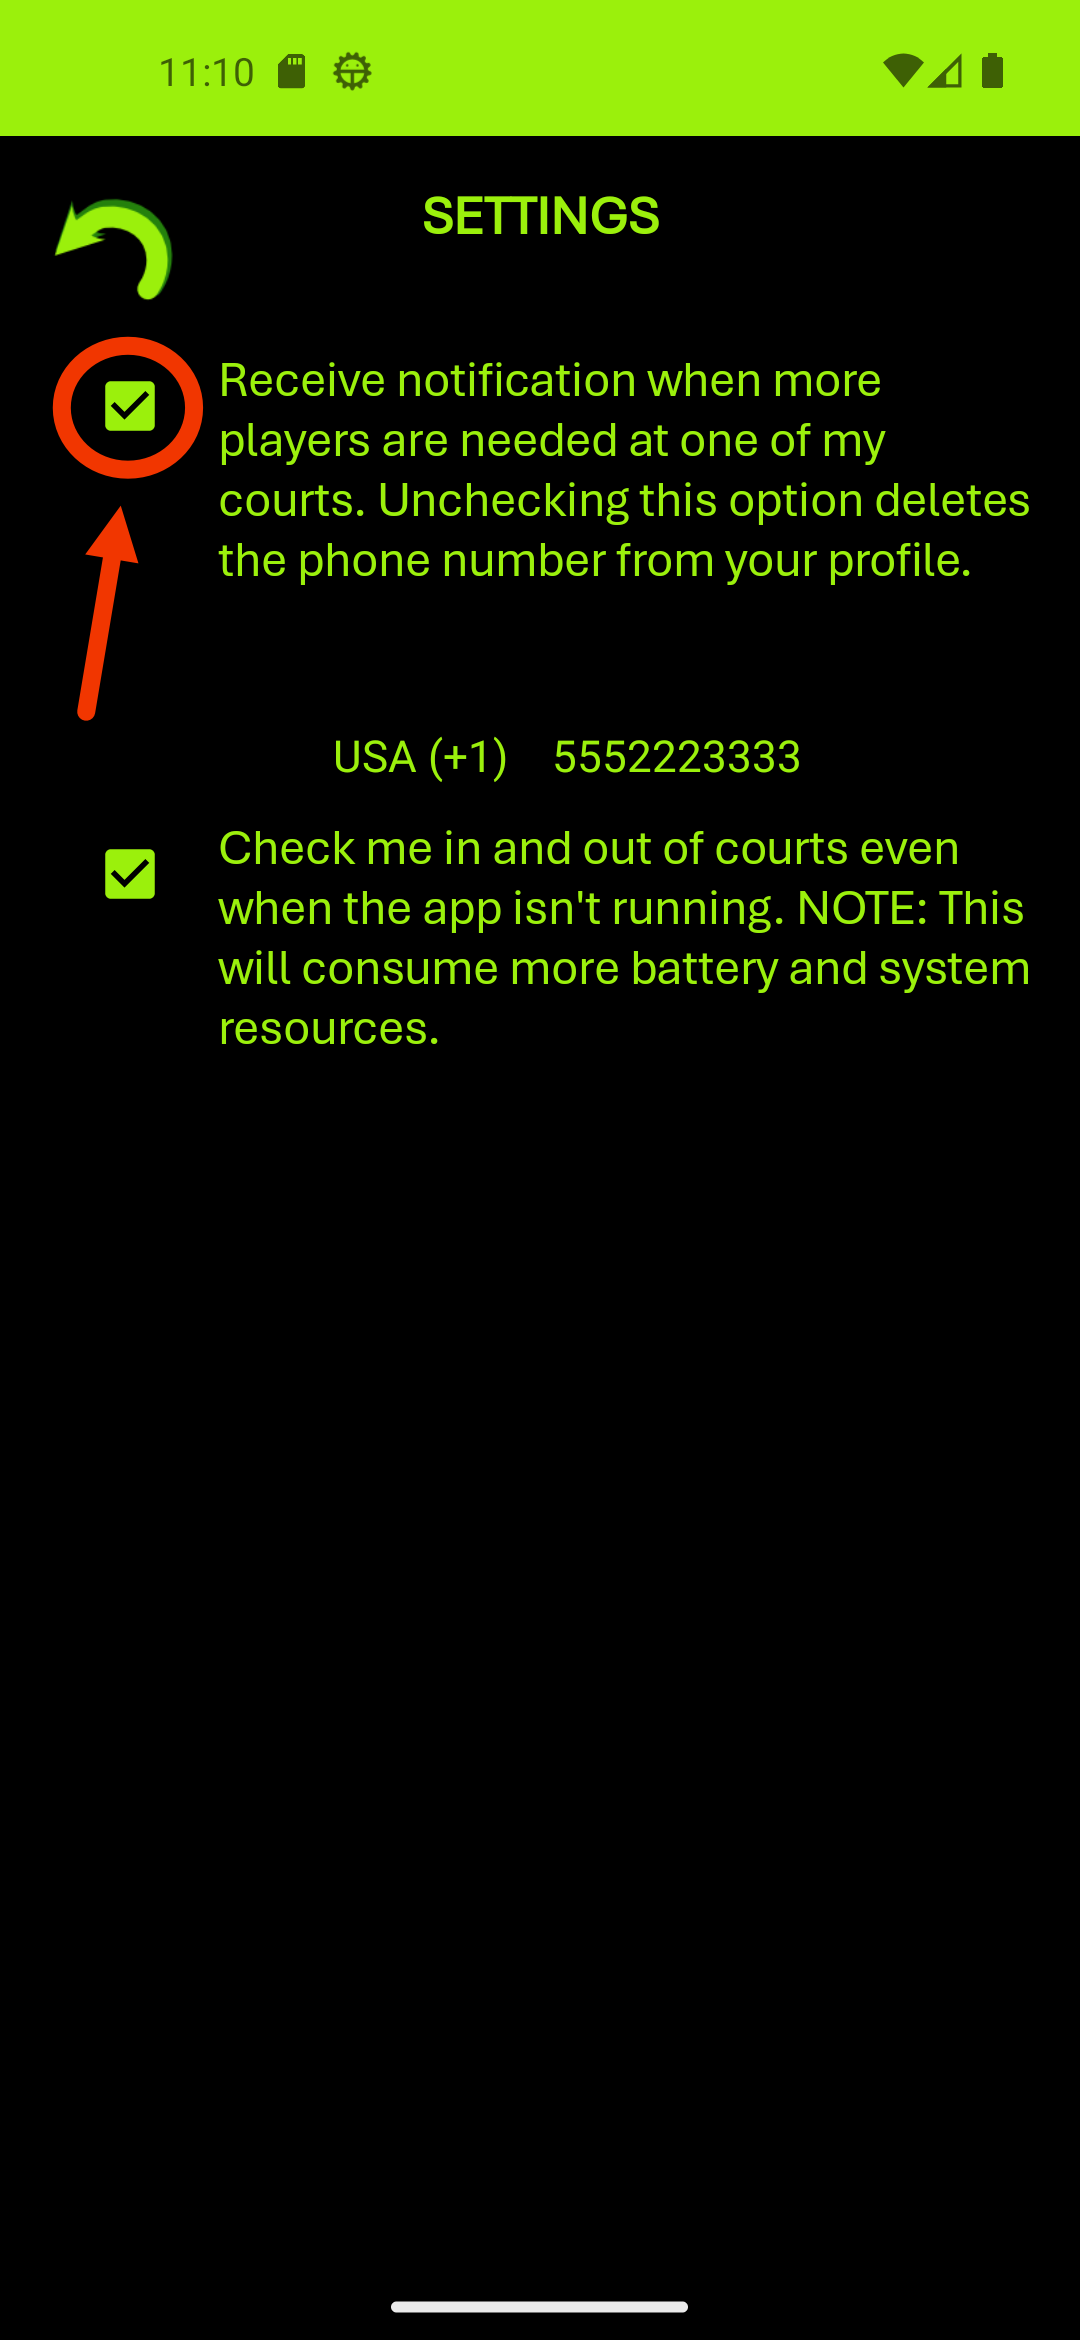
- Check the box to Receive Notifications
- That's it; when you return to the start page your changes are saved.
How to Opt Out
To opt out of receiving messages you follow the opposite steps for opting in. Use the following steps to do so:
Opt Out
- Click the Settings icon on the start page.
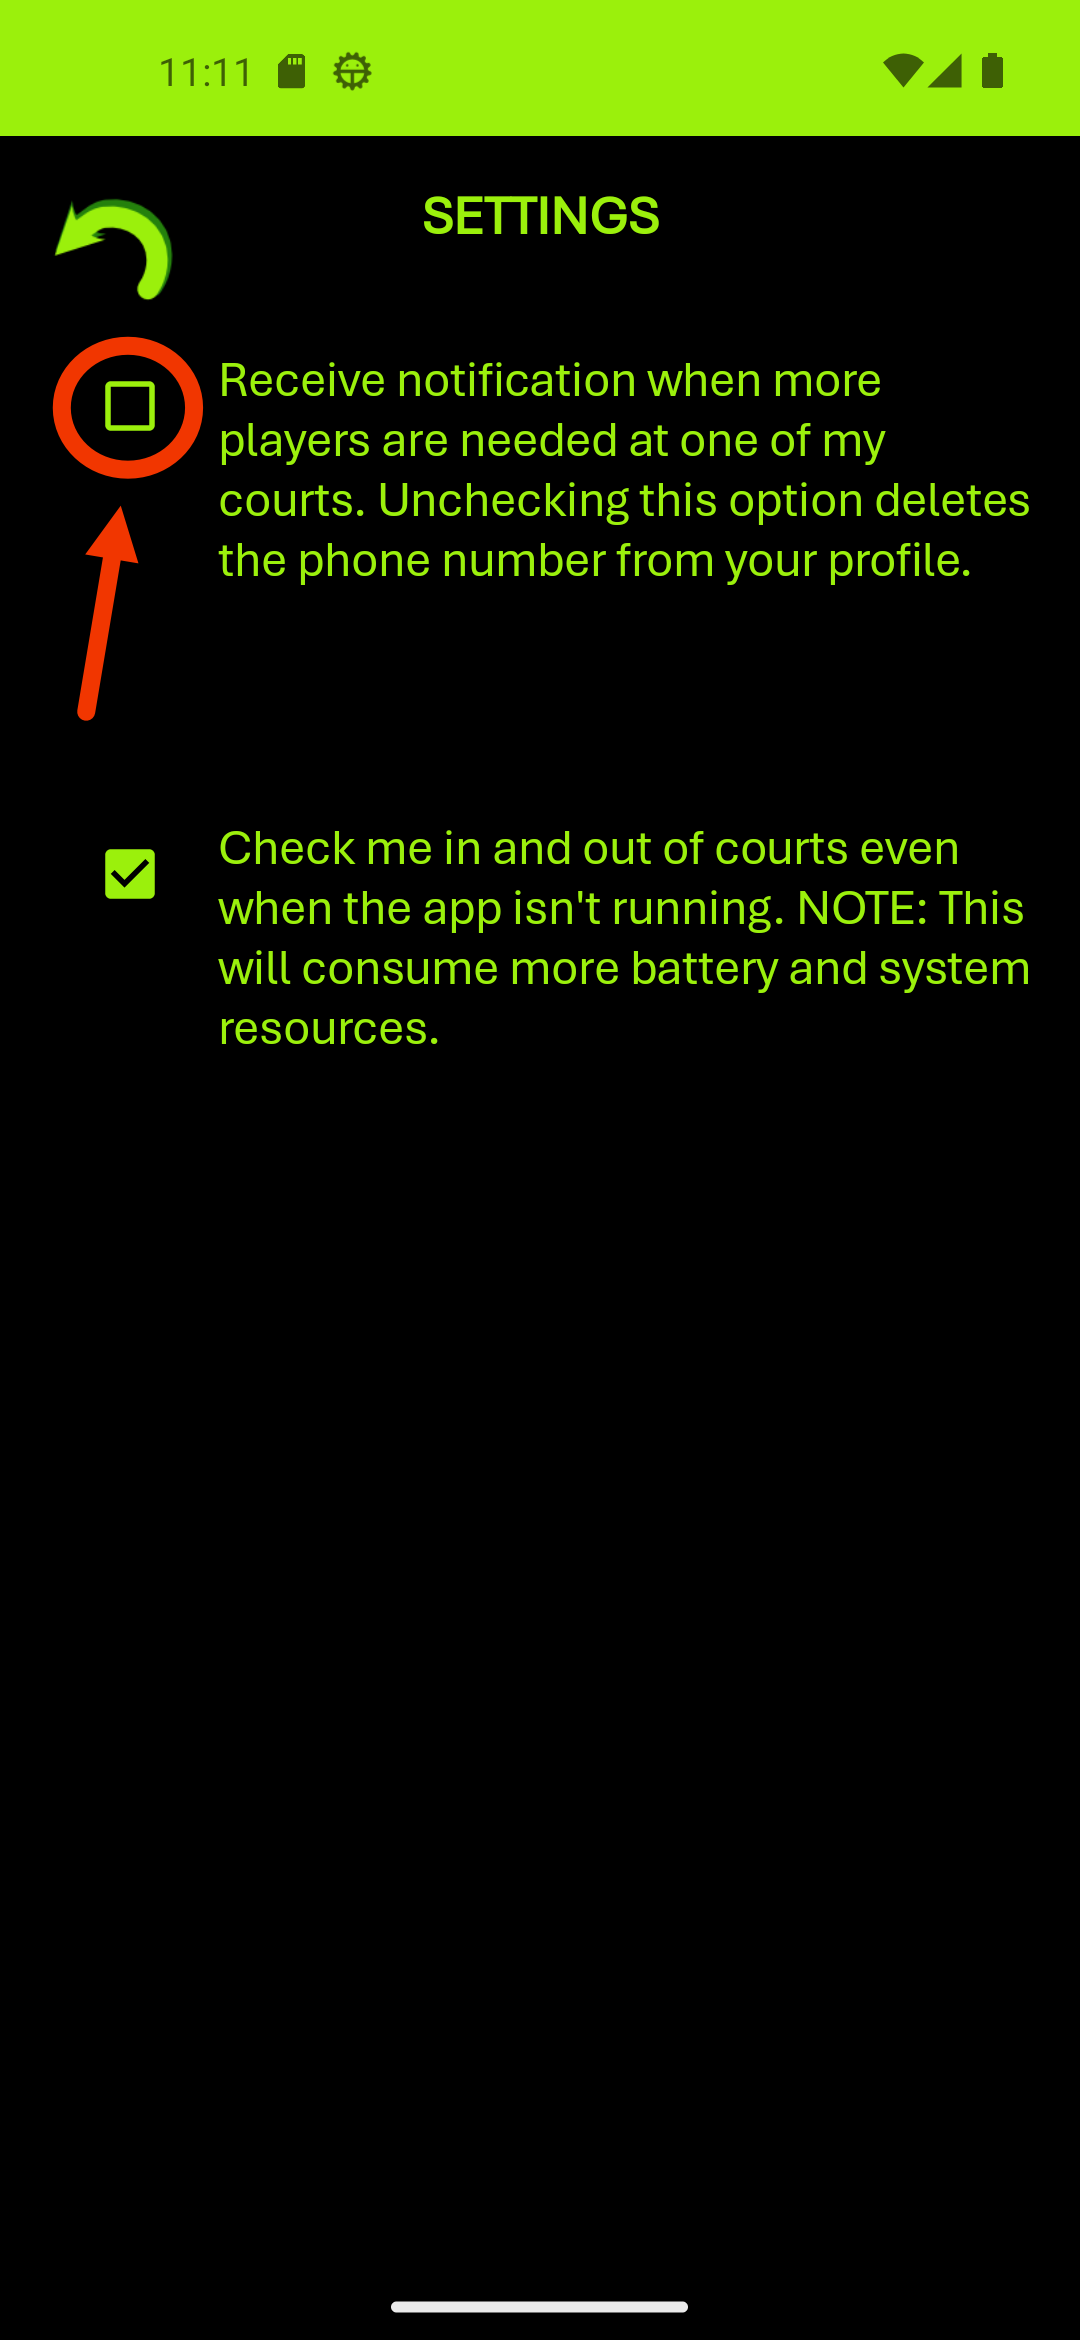
- Uncheck the box to Receive Notifications
- That's it; when you return to the start page your changes are saved.